Highway & Road Solar Street Light Installation: Specs, Poles, and Best Practices for SA Contractors

When bidding for road infrastructure tenders in South Africa, EPC contractors and builders face two major local realities: severe load shedding leaving highways in the dark, and rampant cable theft that renders traditional grid-tied lighting useless.

(Professional DIALux 3D layout simulation ensures tender compliance for highway projects)

Finding a reliable solar street light for road project is the ultimate solution. However, winning a municipal or SANRAL (South African National Roads Agency) tender isn't just about offering the brightest light—it’s about tender technical compliance and seamless site execution.

In this comprehensive guide, we break down the international lighting standards (EN 13201), debunk electrical myths like whether solar street lights need earthing, and explain why partnering with a one-stop solution provider saves you major installation headaches.

1. Designing to EN 13201-2:2015 Standards: Road Classification & Pole Specs

When bidding for high-end South African municipal or SANRAL projects, rule-of-thumb estimates are not enough. The tender committee requires the lighting design to strictly comply with international standards such as EN 13201-2:2015 (Road lighting - Performance requirements).

EN 13201 is a performance-based standard. It does not dictate what pole height or wattage you must buy; instead, it specifies the exact photometric results (Luminance, Illuminance, Uniformity, and Glare) that must be achieved on the road surface based on traffic speed and volume.

Here is a breakdown of the three main road classes you will encounter in tenders, and the industry best-practice pole specs our engineers recommend to guarantee compliance with these standards:

A. Highway / Main Arterial Roads (EN 13201: M-Class)

For high-speed motorized traffic, the standard focuses on high road surface luminance (Lav) and strict disability glare control (Threshold Increment - TI).

EN 13201-2 performance requirements table for M-Class highway solar street light for road projects

(Above: EN 13201-2 target metrics for M-Class roads)

To achieve these high-speed metrics, we recommend:

  • Pole Height: 8m – 12m
  • LED Power: 80W – 150W (High-lumen output)
  • Pole Spacing: 30m – 40m
  • Beam Angle Optic: Type II / Type III (Designed for wider forward throw)

B. Municipal Urban Roads (EN 13201: C-Class & P-Class)

For low-speed urban roads, conflict areas, and walkways, the standard shifts focus to horizontal illuminance (Eav) and semi-cylindrical illuminance to ensure pedestrians can recognize faces from a safe distance.

EN 13201-2 photometric requirements table for P-Class pedestrian and urban solar led street light installations

(Above: EN 13201-2 target metrics for P-Class pedestrian & low-speed areas)

To achieve these urban metrics, we recommend:

  • Pole Height: 6m – 8m
  • LED Power: 60W – 100W
  • Pole Spacing: 25m – 30m
  • Beam Angle Optic: Type II / Type III

C. Rural Roads / Village Roads (Lower P-Class)

For remote township projects or off-grid village roads where safety and basic visibility are the primary concerns (falling under lower P5-P6 classes), a cost-effective yet reliable configuration is required.

  • Pole Height: 5m – 6m
  • LED Power: 40W – 60W
  • Pole Spacing: 20m – 25m
  • Beam Angle Optic: Type II / Type V (Depending on road width)

💡 The Engineering Rule of Spacing (Backed by CIE 115 & IESNA RP-8)

To consistently hit the overall uniformity (Uo) targets shown in the tables above without creating dark spots, optical designs must align with global roadway lighting guidelines, including CIE 115 (International Commission on Illumination) and IESNA RP-8.

Based on the photometric geometry required by these standards, the industry's best-practice rule for modern batwing lenses is to set your Pole Spacing ≈ 3 to 4 times the Pole Height. For example, an 8-meter pole typically requires 24m to 32m spacing depending on the optic lens used.

2. Proving Compliance: Why DIALux Simulation Wins Tenders

DIALux roadway lighting simulation report proving EN 13201 compliance for solar street light with pole system

Municipal consultants do not want verbal promises; they want mathematical proof. This is why we provide comprehensive DIALux simulation reports for our EPC partners. As shown in the simulation above, our optical design proves to the tender committee that your bid achieves the exact Average Luminance (Lav) and Overall Uniformity (Uo) required by EN 13201, ensuring you pass the technical evaluation with ease.

3. Avoiding the Mix-and-Match Trap: The One-Stop Solution

Once the design is approved, site execution begins. One of the biggest headaches for SA contractors is sourcing the light fixture from Supplier A, the bracket from Supplier B, and hiring a local steelworks to make the pole. This often leads to mismatched spigot sizes, weak structural integrity, and delayed handovers.

We solve this by offering a complete solar street light with pole system, engineered specifically for municipal-grade durability:

  • Municipal-Grade Waterproofing: Summer thunderstorms and coastal humidity are brutal. Our solar led street light fixtures feature true IP65/IP66+ waterproof ratings, ensuring the battery and controller remain absolutely dry.
  • Aerodynamic & Wind-Resistant Poles: For coastal areas like Cape Town or Gqeberha, our hot-dip galvanized poles and precision brackets are engineered to withstand 35–45m/s gale-force winds, providing the optimal tilt angle for maximum solar charging.
  • Pre-Drilled & Matched: All components are factory-matched to fit perfectly on-site, drastically reducing your labor hours.

4. Best Practices: How to Install Solar Street Light

Proper installation ensures the longevity of the system. Here is a streamlined guide on how to install solar street light systems efficiently for highway projects:

  1. Step 1: Foundation Pouring. Excavate the hole (typically 1/6th of the pole length). Place the anchor bolt cage (J-bolts) and PVC conduit (for the earthing wire) before pouring the concrete. Ensure it cures completely.
  2. Step 2: Ground Assembly. Never attempt to assemble the fixtures at the top of a standing pole! Lay the pole horizontally on the ground to attach the bracket, solar panel, and light fixture.
  3. Step 3: Plug-and-Play Wiring. Connect the aviation cables between the solar panel and the light. Our systems feature waterproof connectors—push them together until you hear a "click," and the seal is secured.
  4. Step 4: Hoisting. Use a crane to lift the fully assembled structure. Align the base plate with the anchor bolts, tighten the nuts, and level the pole.

5. Frequently Asked Questions (FAQs)

Q1: Does solar street light need earthing?

Typical pole earthing detail CAD drawing for solar street light lightning protection

(Above: Standard CAD drawing for metal pole earthing)

Yes, the metal pole must be earthed. While solar lighting operates on a low-voltage DC system (eliminating the risk of fatal electric shock), earthing is strictly required for lightning protection.

South Africa experiences high lightning strike density. If a metal light pole is not properly earthed, a nearby lightning strike will send a massive surge directly into the equipment, instantly frying the MPPT controller and lithium battery. Proper earthing protects your asset and prevents high maintenance costs.

Q2: How to set solar street light with remote for batch programming?

When installing 100+ lights, manually climbing each pole is inefficient. Using our remote control, you can:

  • Program your desired dimming profile (e.g., 100% brightness for the first 4 hours, 50% till dawn) into the remote.
  • Press the "Send" or "Copy" button.
  • Walk or drive slowly along the installation site, point the remote at the sensor of each light, and press the trigger.

You can program an entire kilometer of highway lighting in minutes, ensuring uniform performance while massively saving on labor costs.

Win Your Next SA Road Tender with Compliant Solar Lighting

Stop risking project handovers with mismatched parts and non-compliant specs. Partner with us for complete EN 13201 compliant solar street light with pole solutions, DIALux simulation reports, and municipal-grade engineering support.

Contact Us for a Custom System Design

2024 Solar Street Lights Installation Guide, Easy for Beginners to Follow!

With the growing global focus on sustainability, solar led street lights have become the preferred lighting solution for outdoor spaces such as parking lots, roads, gardens, and communities. They are not only energy-efficient and environmentally friendly but also provide long-lasting and efficient lighting. Compared to traditional grid lighting, solar LED street lights are easier to install, requiring no cable laying and offering lower installation costs.

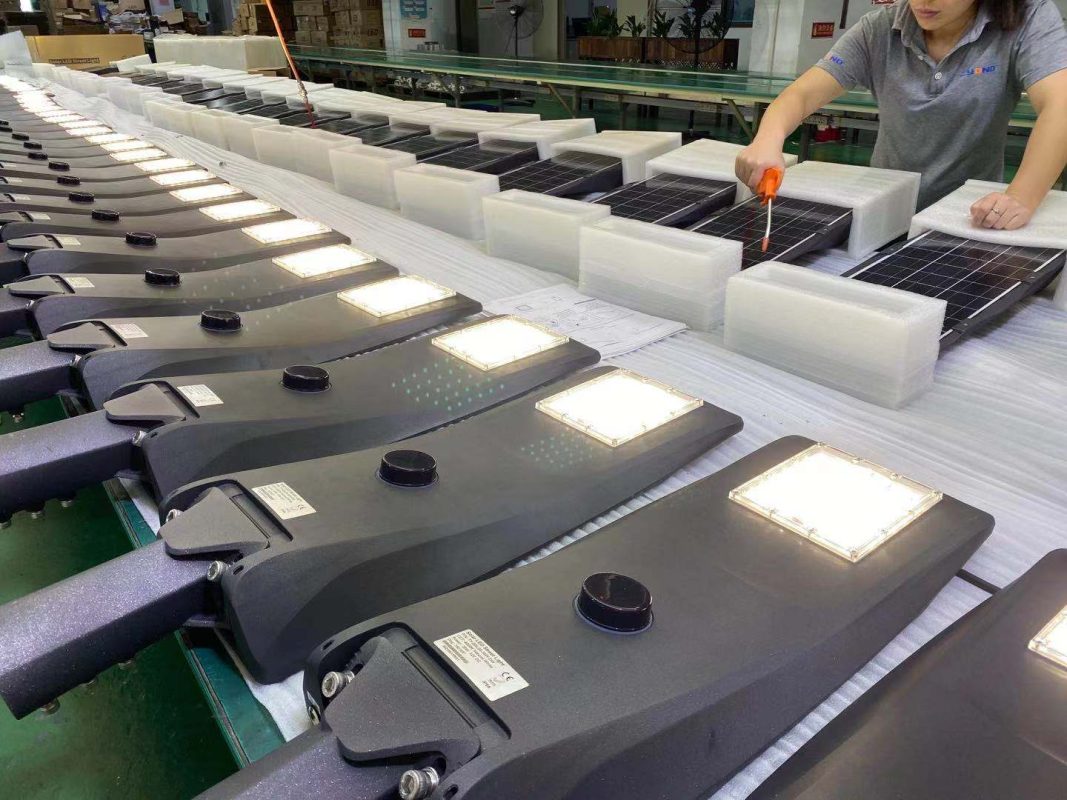
This guide will briefly explain how to install solar led street lights, helping you complete the installation quickly and make the most of these lighting solutions. We will use the Sunpro series solar Led street light as an example, showcasing the entire process from production to installation.

Solar led street lights_ Solar led street lights installation pictures
installation Pictures

We will cover the following two aspects:

  1. Required tools and preparations
  2. Installation steps

Required Tools and Preparations

Before starting the installation, ensure you have the following tools ready:

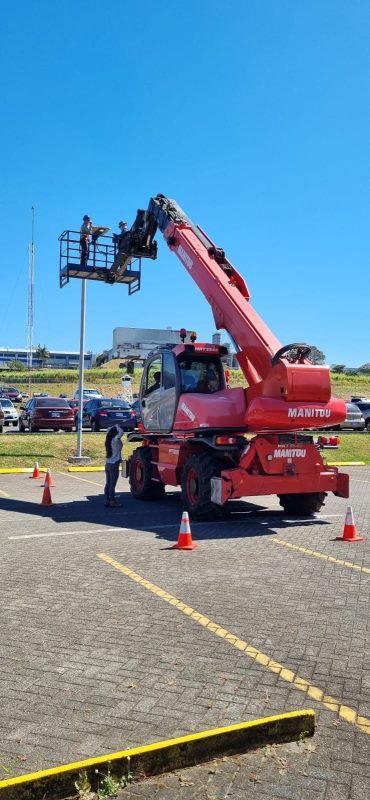
  • Lifting equipment (20 meters high)
  • Adjustable wrench
  • Allen wrench
  • Installation manual

Set up safety barriers around the installation area to ensure safe construction.
Component check: Integrated solar street lights are simple, typically including the light body and base fixtures. Carefully check these parts before installation.

Installation Steps

Step 1: Choose the Right Installation Environment
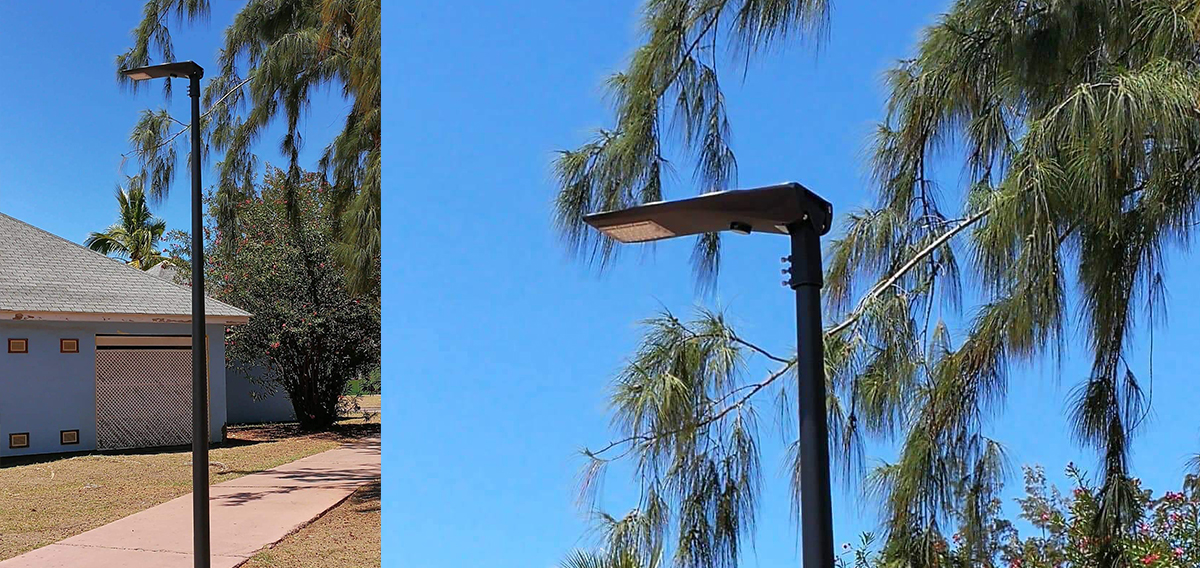
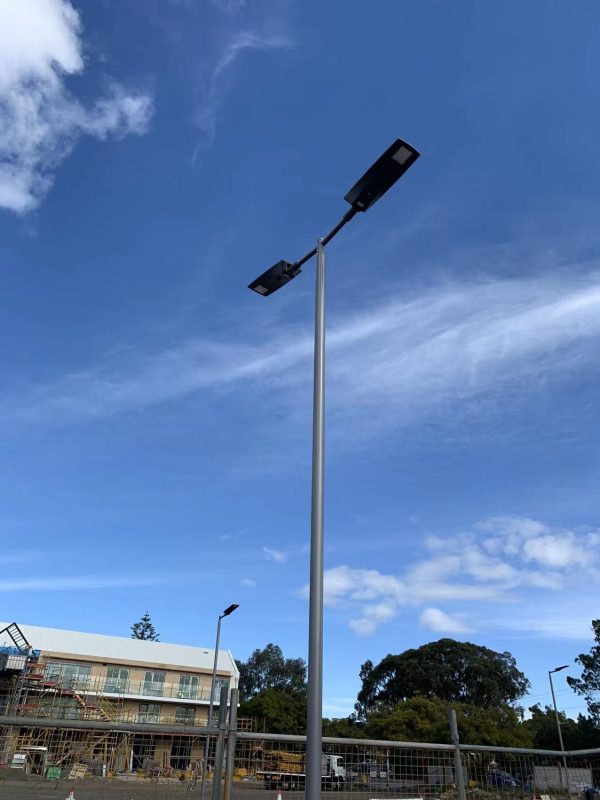
When selecting the installation location, ensure that the solar panel receives ample sunlight. Avoid shaded areas or places obstructed by buildings.

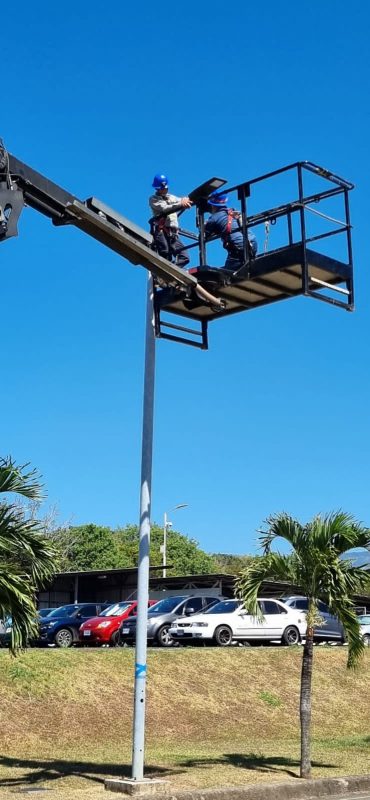
  • Pole installation: Choose open, unobstructed areas to ensure the solar panel can fully capture sunlight. (Refer to the solar street lights installed in the parking lot by our Australian client)
Parking lot lights case

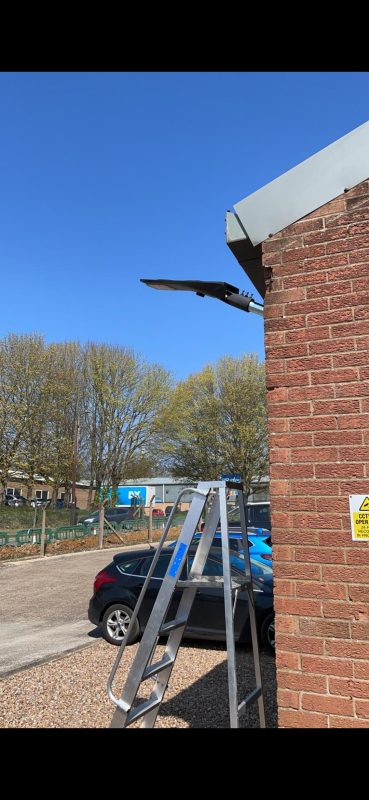
Wall-mounted installation: If opting for wall-mounted installation, the length of the light arm should be long enough, ideally no less than 1 meter, to avoid shade and maximize sunlight exposure. For example, refer to the installation images from our UK client,Note that this method is less optimal compared to other installation options.

LED solar street lights wall-mounted

Step 2: Solar Panel Orientation
Ensure the solar panel is positioned to receive the maximum amount of sunlight. When installing in the Northern Hemisphere, the solar panel should face south for optimal sunlight exposure. In the Southern Hemisphere, ensure the panel faces north to capture the most sunshine

Step 3: Install the Base
Select a flat surface and use four screws to secure the base. The base should be aligned parallel to the road edge and secured with concrete for stability.

Step 4: Install the Light Body
Attach the solar LED light body to the pole or bracket, ensuring it is stable and does not wobble. Adjust the light fixture’s angle to cover the desired illumination area.

Step 5: Testing and Adjustment
After installation, switch on the light, and it will go through an activation process. Simulate a nighttime environment by covering the solar panel to ensure the light automatically turns on and operates correctly.

Conclusion

By following the above steps, you can easily complete the installation of solar street lights. Outdoor solar lighting significantly reduces energy costs while providing long-lasting and reliable illumination for communities, roads, and parking lots. The 2024 solar LED street lights are an ideal choice for outdoor lighting, combining environmental sustainability with high efficiency.
For further information, please refer to our installation manual or contact us for additional support.


Solar Street Lights – Powerful and Eco-Friendly Outdoor Lighting Solutions

Solar Powered Street and Parking lot lights
Illuminate your streets, sidewalks, parking lots, and outdoor areas with our high-quality Solar Street Lights. At Outdoor Solar Store, we provide advanced solar-powered street lighting solutions that offer reliable performance and exceptional durability without the need for electrical wiring or battery replacements.

Leave a Reply

Your email address will not be published. Required fields are marked *

Facebook X Pinterest linkedin Telegram
Start typing to see products you are looking for.